Last Updated on by
Quick & Easy 5 Step Guide to Building Your Own Corner Shelf!

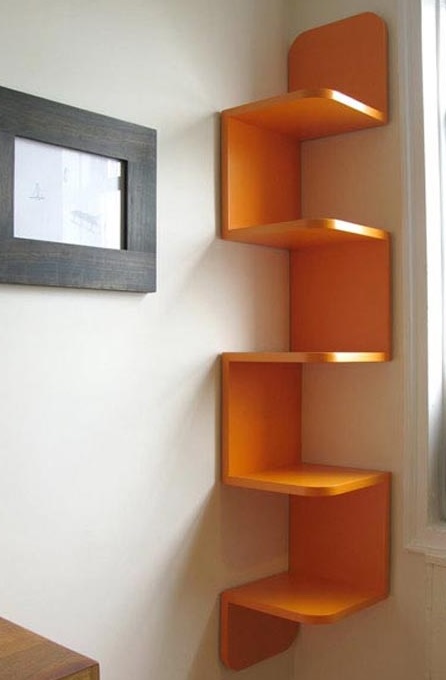
Hanging Corner Shelves look great! (via: Instructables)
Back in April, we touched on Corner Shelving in our Weekly Round-Up. We received such positive feedback that we decided to create this DIY Guide on How to Build Your Own Corner Shelf! Follow this quick and easy 5 Step Guide to add some extra space to your restroom! Let’s get started on this DIY corner shelving unit!
Step 1: Gather Tools & Cut Materials
To begin with, you will need these tools and materials:
1.Tools – Miter saw, biscuit joiner, orbital sander, clamps, and a tape measure.
2.Materials – 1”x 10” x 6” pine board, Copper Nails, #10 biscuit joiner, and wood glue.

Here are your six 9 1/2″ cuts + two 4 1/2″ cuts on the right. (via: Instructables)
• The first step is to use your miter saw to cut your pine board into six 9 ½”squares to use as shelves. Also make two 4 ½” cuts on the top and bottom slab.
• Once this is complete, you can slightly sand the material of any rough areas keeping in mind that it does not have to be perfect just yet!
Step 2: Lay out Shelf and Make Cuts

Here you can see the scrap piece of wood clamped down to the table. Align your shelf so that it is flush with the table to ensure uniform cuts. (via: Instructables)
• Next, lay out the pieces you cut so that you can visualize the shelf unit. This will help you see where your project is headed! Proceed to clamp a square scrap piece of wood to your workbench to use as a backing for the biscuit joiner. This will provide a stable workplace while you use your joiner.
• The basic concept is this; you cut an oval shaped hole into the side of the shelf and then use a small biscuit (oval-shaped piece of compressed wood) to join the two shelves together. Glue is then applied to create a stronger bond.
• One at a time, you want to line the shelf up with the edge of the work table to align the biscuit joint cuter. Use the biscuit joiner to insert a cut that will be used to join your two pieces of wood together. The biscuit joiner will cut a small crescent-shaped hole into the side of your piece of wood which will then be used to piece together your shelving unit.
Step 3: Glue it together!

Allow your wood-glue adequate time to dry to ensure a firm bond! (via: Instructables)
• After you have made all of your biscuit cuts, use a brush to glue the biscuit joints together in the correct layout that you would like for your shelf.
TIP: To save time, you can make 3 different sections (top, middle, & bottom) that you can glue together separately and then glue the 3 larger sections together. This will make it easier to glue the pieces together without falling apart due to the weight of the wood. We highly recommend that you wait an hour to let each individual section set before gluing all 3 sections together!
Step 4: Final Sanding

Sand until you can run you hand across all surfaces without feeling any splinters or rough surfaces. (via: Instructables)
• Allow the glue to dry for 2-4 hours. When the glue has completely dried, you can use your orbital sander with 220 grit sand paper to smoothen out any imperfections in the wood. You can round out the outside corner of each shelf if you would like to avoid sharp/pointed edges.
Step 5: Final Finish

Final Installation of your custom Corner Shelving Unit! (via: Instructables)
• In order to install the shelf, you will need to drill two recessed holes at the bottom and the top of the shelf “slabs” and anchor the shelf into the wall.
• The screw holes will then be covered by buttons and should blend in nicely! For a final custom touch, you can stain or paint the finished shelving unit to your preference!
Finally, do a celebration dance because you did it! Congratulations on building your very own Corner Shelving Unit!
More DIY Tips!
- How to Etch Your Glass Bathroom Mirror
- A Down-and-Dirty DIY Shower Rack Hack
- 5 DIY Tricks for a Brilliantly Clean Bathroom
- Use Origami to Fold Towels into Wild Animals!
- Renewing Laminate Vanity Countertops with a Fresh Coat of Paint
About This Post
Cheryl Khan is an interior designer and freelance writer. When she is not in the backyard watering her plants, she can be found reading a good book and all of the latest magazines!

[…] « DIY Corner Shelving […]